In this article, we’ll take a look at what podcast equipment you’ll need to make a great quality show. You’ll learn what to prioritise so you can level up from a great quality beginner podcast setup to a really professional level of sound. Great podcasting equipment is available for all budgets – let’s find out what suits you.
In this article...
What equipment is needed for a podcast
The absolute essentials for recording a podcast are a microphone, some kind of smart device such as a phone or iPad (but preferably a laptop or computer) and some recording and editing software. If you can afford it, we’d also recommend an audio interface so you can mix your mic level, but if you’re super tight on budget then that’s less important than the first three mentioned.
We’ll dig deeper into all of these, recommendations of what to buy for all budgets, plus optional extras that can really level up your sound quality.
Podcast equipment essentials & setup
Microphone
Podcasting is all about audio, naturally. That means it’s absolutely paramount that your podcast sounds good. If your podcast sounds like it was recorded on a toaster, no one’s going to listen, regardless of how good the content is.
Should I use a USB or an XLR microphone?
XLR mics are the industry standard, used by every musical artist you could name and a lot of the top podcasters. To use them you’ll need an audio interface, as they have a 3-pronged output plug. This is an extra bit of kit to buy for someone on a tight budget, but using an interface allows you to manage the sound more granularly.
Your other option is a USB mic – you can still get a very good sound out of these, and the fact that they’re USB means they’re plug and play for your laptop, removing the need for an interface. The only downside is that the preamp is built into the mic, so you’ll have less control over how your audio sounds. As you’re starting out, this will be fine, but as you get deeper into podcasting you might want more granular control.
Microphone Recommendations
Let’s take a look at some microphones to suit all budgets.
Budget (Under $100): Audio-Technica ATR2100x-USB Cardioid Dynamic Microphone
Cost: $79
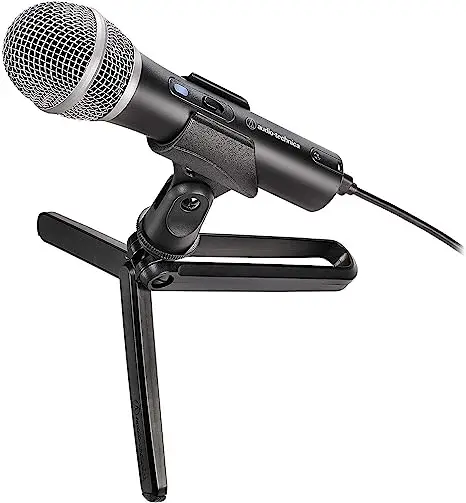
Boasting dual XLR and USB connections, the Audio-Technica is a real workhorse. Having both XLR and USB options means you can use the mic with or without an interface, so you can continue using it as the rest of your equipment scales.
It’s also a dynamic microphone, which filters out background noise – this is ideal for those recording at home, without studio insulation. It’s a really great choice for beginners and scales well for more experienced podcasters too.
Mid-Range (Under $200): RØDE Procaster
Cost: $166
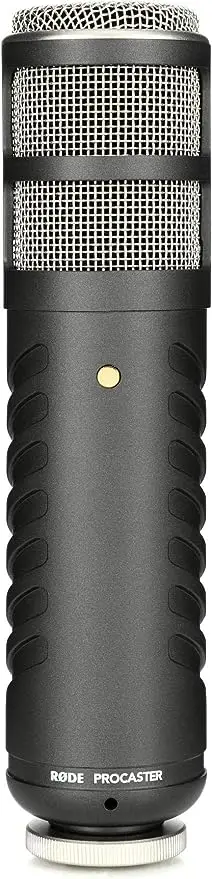
Rode mics are rightfully revered among podcasters, and for good reason. This particular model comes with an inbuilt pop filter and cushioning, meaning your audio will come out crisp, clear and bump free.
This is a dynamic mic and features XLR connection, so you’ll need an audio interface to use it with your laptop.
High End (Up to $500): Heil Sound PR40
Cost: $344

The Heil PR40 describes itself as “condenser-quality sound without the background noise” – bold statement, but we think it lives up to it. A condenser mic is super receptive, used in a lot of radio studios and in recording, but generally not advisable for bedroom podcasters as they pick up too much ambient noise.
Being a dynamic mic, the PR40 doesn’t pick up those background bumps and scrapes, but it achieves this without compromise in sound quality.
It features XLR connections, so you’ll need an interface to use it.
Do I need a more expensive microphone for a successful podcast?
Not necessarily, no – a decent microphone is important, but it doesn’t have to break the bank. When budgeting, if you can spend a little more on one thing, go for the mic. It’s got the most direct impact on your audio quality.
Generally, microphones start including more advanced features as you get to the more expensive ones, such as in-built pop and wind filters. Read reviews and ask in podcasting communities on Reddit and Facebook what’s best for your budget.
Headphones
A good pair of headphones are essential for every podcaster – they allow you to listen to your episode as your audience will hear it, making sure you can guarantee audio quality.
Another article we think you'd like...

Reading Time: 7 minutes Learn how to build your premium content offering and how much you should charge for it, along with everything you need to launch your private podcast, successfully and for free, with Captivate.
We’d recommend going for wired headphones if you’re sat at your desk, as you get a better sound quality. If you’re out and about when recording, wireless ones are OK too.
We recommend: Sony MDR7506
Cost: $98.45
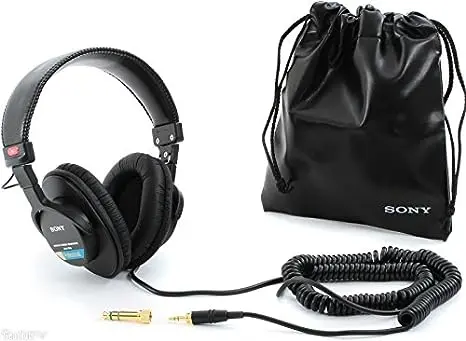
Look after them, and these Sony headphones will last you for your whole podcasting career. There’s not too much to say about them other than that they sound great – you’ll be able to hear all the nuances in your recording and optimize it based on them – and that they cost less than $100.
If you’re looking for something a little cheaper, this Audio Technica pair have got great reviews and will set you back around $50. If money is no object, you can’t do better than the Shure SRH940 around $225!
A device to record into
You’ll need some kind of smart device in which to record your podcast. A laptop or computer would be best, but a smartphone or tablet would work too. You essentially just need some sort of device to physically record and store the audio for your podcast, so that you can later edit, download as MP3 and upload to your podcasting host.
Recording and editing software
You can read our full rundown of recording and editing software, from free options to paid apps with all the bells and whistles, but let’s go over the basics here too.
You can get an all-in-one recording and editing solution for free – they work great and if you don’t have the budget, they’re the absolute best area on which to save money. You could use Audacity, which works on all operating systems and is specifically designed for podcasters, or, if you’re more familiar with Apple’s OS, Garageband.
Garageband was designed for musicians, so there’ll be some features to ignore such as metronomes and electric drums, but it’s free and intuitive to use if you’re familiar with Apple software. It is an iOS exclusive, though.
If you have some budget for this, we’d recommend something like Descript. When you record in-platform or upload a recorded file, Descript auto generates a transcript for you. You can then edit the transcript like a Word document and this actually edits the recording – removing filler words and false starts.
Best of all, Descript creates an AI reconstruction of your voice, so you can type things you forgot to include and it adds them to the recording. To get the most out of Descript, you’ll want to be on their $24/month plan, which includes 30 hours of transcription per month and doesn’t limit your editing capabilities. They do offer free and lower tier plans, too.
Some other super popular recording options are Riverside ($24/month) and SquadCast ($40/month). Both offer studio quality remote recordings for you and your guests, as well as loads more great features for podcasters. You’ll need separate editing software, though, as these are recording only.
Optional advanced podcast equipment & setup
You can record a podcast without all the kit we’ll talk about below, but they’re just useful and can help your sound reach the next level.
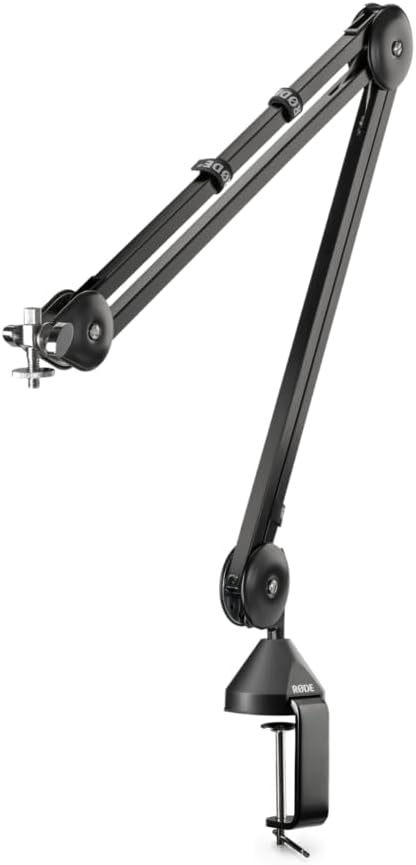
Boom arm
A boom arm is a posable appendage to keep your microphone off your desk. Using one allows you to position your mic as close to your mouth as you’d like, and means you won’t bump it and ruin the recording. As a general rule, you want your mic to be the width of your fist away from your mouth.
We’d recommend this Rode model, which clocks in at just under $100.
If you’re after a slightly cheaper arm, you can pick up this TONOR model for under $40.
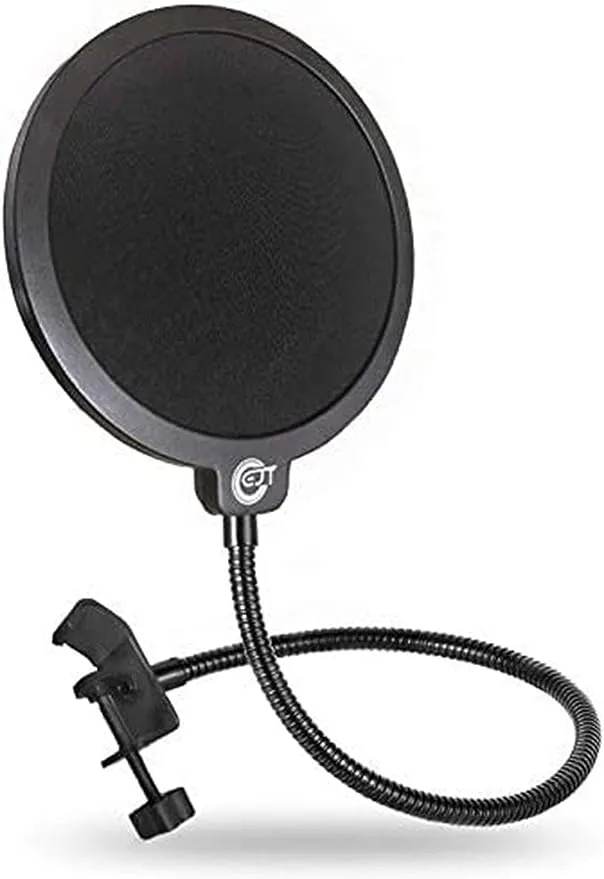
Pop filter
A pop filter is a little screen to go in front of your microphone to make sounds less harsh – especially plosive words which start with a p-. It’s just another thing to take your audio from amateur bedroom quality to professional quality – and every improvement in audio will help you grow and retain listeners.
You can pick one up for about $10 – well worth the investment.
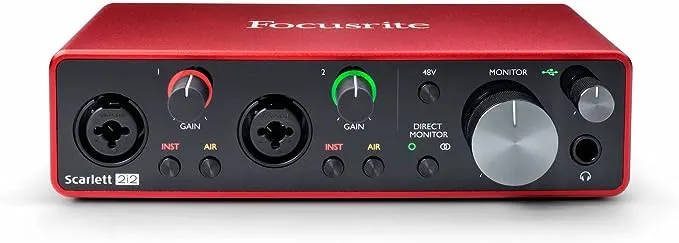
Audio Interface
Included in this section because you can record a podcast without an interface, just using a USB mic plugged into your computer, we’d really recommend using one. An interface allows you more control over your input volume and opens up the opportunity to use XLR microphones, which are generally better quality.
The Scarlett Focusrite 2i2 is a tried and tested model, and will set you back just shy of $190.
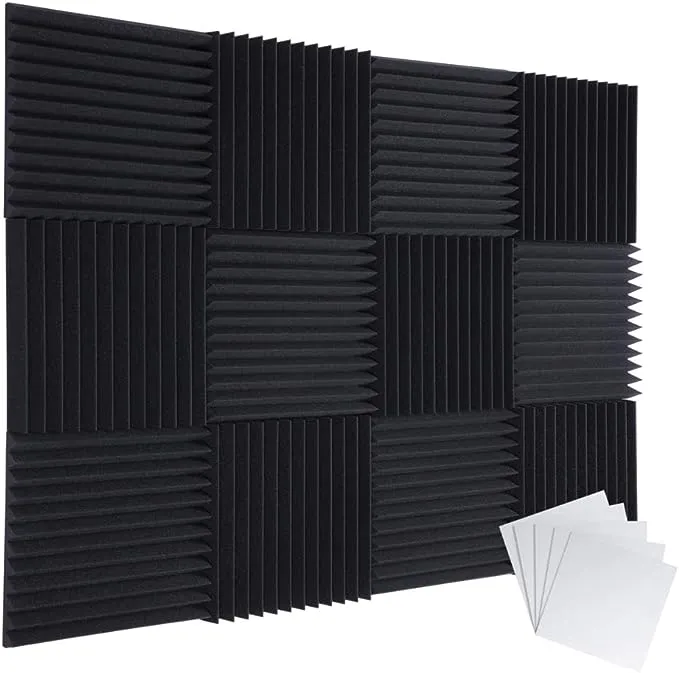
Acoustic treatments
Some foam on the walls of your recording space goes a long way towards improving the sound of your recording. Hard walls reflect sound back whereas a padded wall will absorb the sound – that’s why all recording studios have those spiky foam panels on their walls.
For $23, it’s way worth picking some up.
Podcast hosting and distribution
A podcast host gets your podcast out there – you upload your audio files and then a hosting company gets your show on streaming services, helps you create a website and delivers you analytics, among other things.
Captivate specializes in what we call the serious indie podcaster – what we do is help you monetize through advertising insertion and paid subscription tiers, as well as optimizing your workflow with dynamic show notes and episode planning.
Sign up for a 30 day free trial today!
Another article we think you'd like...

Reading Time: 6 minutes We dive into the best podcast microphone setups for beginners on a budget (all under $100!) Read our honest reviews and learn about the best types of microphone for quality audio every time.
What to consider when buying podcast equipment
There are a fair amount of factors to weigh up when you’re deciding what equipment to buy for your podcast – let’s look at what you need to be considering.
Format. If you’re doing a solo show, your choice of editing and recording software is more open than if you’re doing something with remote guests. If your show falls into that category, you need to make sure your recording software can record with someone else who isn’t in the room – something like Riverside.
Budget. This one’s a bit of a no-brainer, but if your budget is tight then you’re best saving it for the most important aspects, like a good microphone. You can get by just fine with the free editing software we discussed above, but having a poor quality recording will turn listeners off from your show immediately.
Reviews. We’ve cherry picked some great options for you in this blog, but if you’re sourcing tech on your own make sure you’re reading reviews – ideally from other podcasters. Sites like Reddit are a great place to ask questions about gear, too.
Location. When choosing equipment make sure to consider your location. For spacious rooms with no carpets, acoustic treatments will help you to reduce echo. If you’re out and about interviewing guests you’ll want a good portable microphone and a wind filter if you’re outside. If there is background noise it’s super important to use a dynamic microphone.
Do I need to consider video for my podcast?
Video podcasting is pretty popular, but it can be a lot to balance, especially for new podcasters. If you’re interested in video, one of the best things you can do is branch out onto YouTube, repurposing your podcast content for that audience.
If you are set on a video podcast, you need to decide on a good camera and a lighting set up to make it nice and visually appealing. Also make sure that all of your content makes sense in an audio-only format, as so many people listen to podcasts driving or walking around.
Using little video clips to promote your show on YouTube Shorts, Instagram Reels or TikTok is a great way to increase your exposure – something like Riverside can help with that.
FAQs
Do I need a mic to start a podcast?
Realistically, yes you do. Podcast is an audio medium, and a poor quality recording will turn listeners away before you’ve even got past your intro. If you’re buying one piece of podcast gear, let it be a good mic.
Can I start a podcast with my phone?
Yes, you can use something like Garageband (or an android friendly equivalent) to record and on your phone. As with the question above, though, using your phone’s internal microphone won’t translate to a good quality recording.
Can you do a podcast without a laptop?
You can do a podcast with a phone or tablet! Just make sure to use a good quality external mic.
Do I need a studio to start a podcast?
Absolutely not! You don’t need a studio for your podcast, many successful podcasters started from their bedrooms! You can find some great quality podcasting equipment without breaking the bank, it’s just about knowing what to spend your money on.
How do I start a podcast with no budget?
With literally no budget, you technically can start a podcast using your phone, laptop or tablet and a free piece of recording and editing software, like Garageband. We’d recommend graduating to using a good quality microphone as soon as your finances allow.
Takeaway
Creating a great quality podcast doesn’t have to break the bank. The absolute essentials you’ll need are a good microphone, some kind of smart device to record into, and some recording and editing software. You’ll already have a smart device and the free editing solutions such as Audition and Garageband are great quality – the only thing you really need to buy is a microphone.
If you have a little more money to invest in getting that perfect audio quality, you can build up a nice little home studio with a boom arm, pop filter and some audio treatments – little touches that will really level up your show and make it indistinguishable from a big budget recording.
Your podcast journey can start today!
If you found this article helpful, we’d recommend checking out our other article, ‘Podcast Logos – Do’s and Don’ts for Creating Knock-Out Cover Art‘.